第一章 命令行开发
1.1 基础工具安装
先安装好Linux虚拟机,建议ubuntu20.04版本,下面的操作均在虚拟机进行。
1.1.1 安装必要库与工具
sudo apt-get install e2fsprogs pkg-config flex bison perl bc openssl libssl-dev libelf-dev libc6-dev-amd64 binutils binutils-dev libdwarf-dev u-boot-tools mtd-utils gcc-arm-linux-gnueabi cpio device-tree-compiler
1.1.2 更改python源
sudo update-alternatives --install /usr/bin/python python /usr/bin/python3.8 1    #/usr/bin/python3.8为上一步查看的Python 3.8的位置
sudo update-alternatives --install /usr/bin/python3 python3 /usr/bin/python3.8 1   #/usr/bin/python3.8为上一步查看的Python 3.8的位置
1.1.3 配置华为云为pip的更新源
mkdir ~/.pip
pip3 config set global.index-url https://mirrors.huaweicloud.com/repository/pypi/simple
pip3 config set global.trusted-host mirrors.huaweicloud.com
pip3 config set global.timeout 120
1.2 编译工具安装
1.2.1 安装编译和构建工具
表1 Hi3861 WLAN模组需要安装的编译工具
| 开发工具 | 用途 |
|---|---|
| SCons3.0.4+ | 编译构建工具 |
| python模块:setuptools、kconfiglib、pycryptodome、six、ecdsa | 编译构建工具 |
| gcc riscv32 | 编译构建工具 |
1.2.2scons
python3 -m pip install scons
#添加环境变量
echo 'export PATH=~/.local/bin:$PATH' | tee -a ~/.bashrc
source ~/.bashrc

1.2.3 kconfiglib
1.2.4 pycryptodome和ecdsa
1.2.5 gcc riscv32
下载
wget https://repo.huaweicloud.com/harmonyos/compiler/gcc_riscv32/7.3.0/linux/gcc_riscv32-linux-7.3.0.tar.gz
解压到home目录
删除压缩包
添加环境变量
1.3 安装Samba服务
将下列信息填入smb.conf的最后一行
[home]
comment = User Homes
path = /home
guest ok = no
writable = yes
browsable = yes
create mask = 0755
directory mask = 0755
指定共享账号
1.4 获取源码
1.4.1 安装git和git-lfs
1.4.2 git用户配置
git config --global user.name "yourname"
git config --global user.email "your-email-address"
git config --global credential.helper store
1.4.3 安装repo和requests
wget https://gitee.com/oschina/repo/raw/fork_flow/repo-py3
sudo mv repo-py3 /usr/local/bin/repo
sudo chmod a+x /usr/local/bin/repo
1.4.4 获取3.0.7LTS版本源码
Danger
关于初学者选择源码的标准,据了解先OpenHarmony的轻量系统已基本稳定,3.1之后版本更新多针对于小型系统和标准系统,故无需追求过高的源码,3.0.7为比较高的适合版本。(个人也喜欢新版本所以选择这个版本)
创建源码存放文件夹
获取OpenHarmony-3.0.7-LTS源代码
#使用repo工具-初始化源码仓
repo init -u https://gitee.com/openharmony/manifest.git -b refs/tags/OpenHarmony-v3.0.7-LTS --no-repo-verify
#使用repo工具-同步源码仓
repo sync -c
#使用repo工具-拉取源码仓大型文件
repo forall -c 'git lfs pull'
1.5 完善编译环境
1.5.1 安装hb
在源码根目录打开终端
python3 -m pip install --user build/lite
echo 'export PATH=~/.local/bin:$PATH' | tee -a ~/.bashrc
source ~/.bashrc
hb -h
1.5.2 安装gn
#建立目录
mkdir -p ~/OpenHarmony/3.0.7/prebuilts/build-tools/linux-x86/bin/
#下载
wget https://repo.huaweicloud.com/harmonyos/compiler/gn/1717/linux/gn-linux-x86-1717.tar.gz
#安装
tar -xvf gn-linux-x86-1717.tar.gz -C ~/OpenHarmony/3.0.7/prebuilts/build-tools/linux-x86/bin/
#删除安装包
rm gn-linux-x86-1717.tar.gz
1.5.3 安装ninja
#下载
wget https://repo.huaweicloud.com/harmonyos/compiler/ninja/1.10.1/linux/ninja-linux-x86-1.10.1.tar.gz
#安装
tar -xvf ninja-linux-x86-1.10.1.tar.gz -C ~/OpenHarmony/3.0.7/prebuilts/build-tools/linux-x86/bin/
#删除安装包
rm ninja-linux-x86-1.10.1.tar.gz
1.6 第一个程序
1.6.1 编写程序
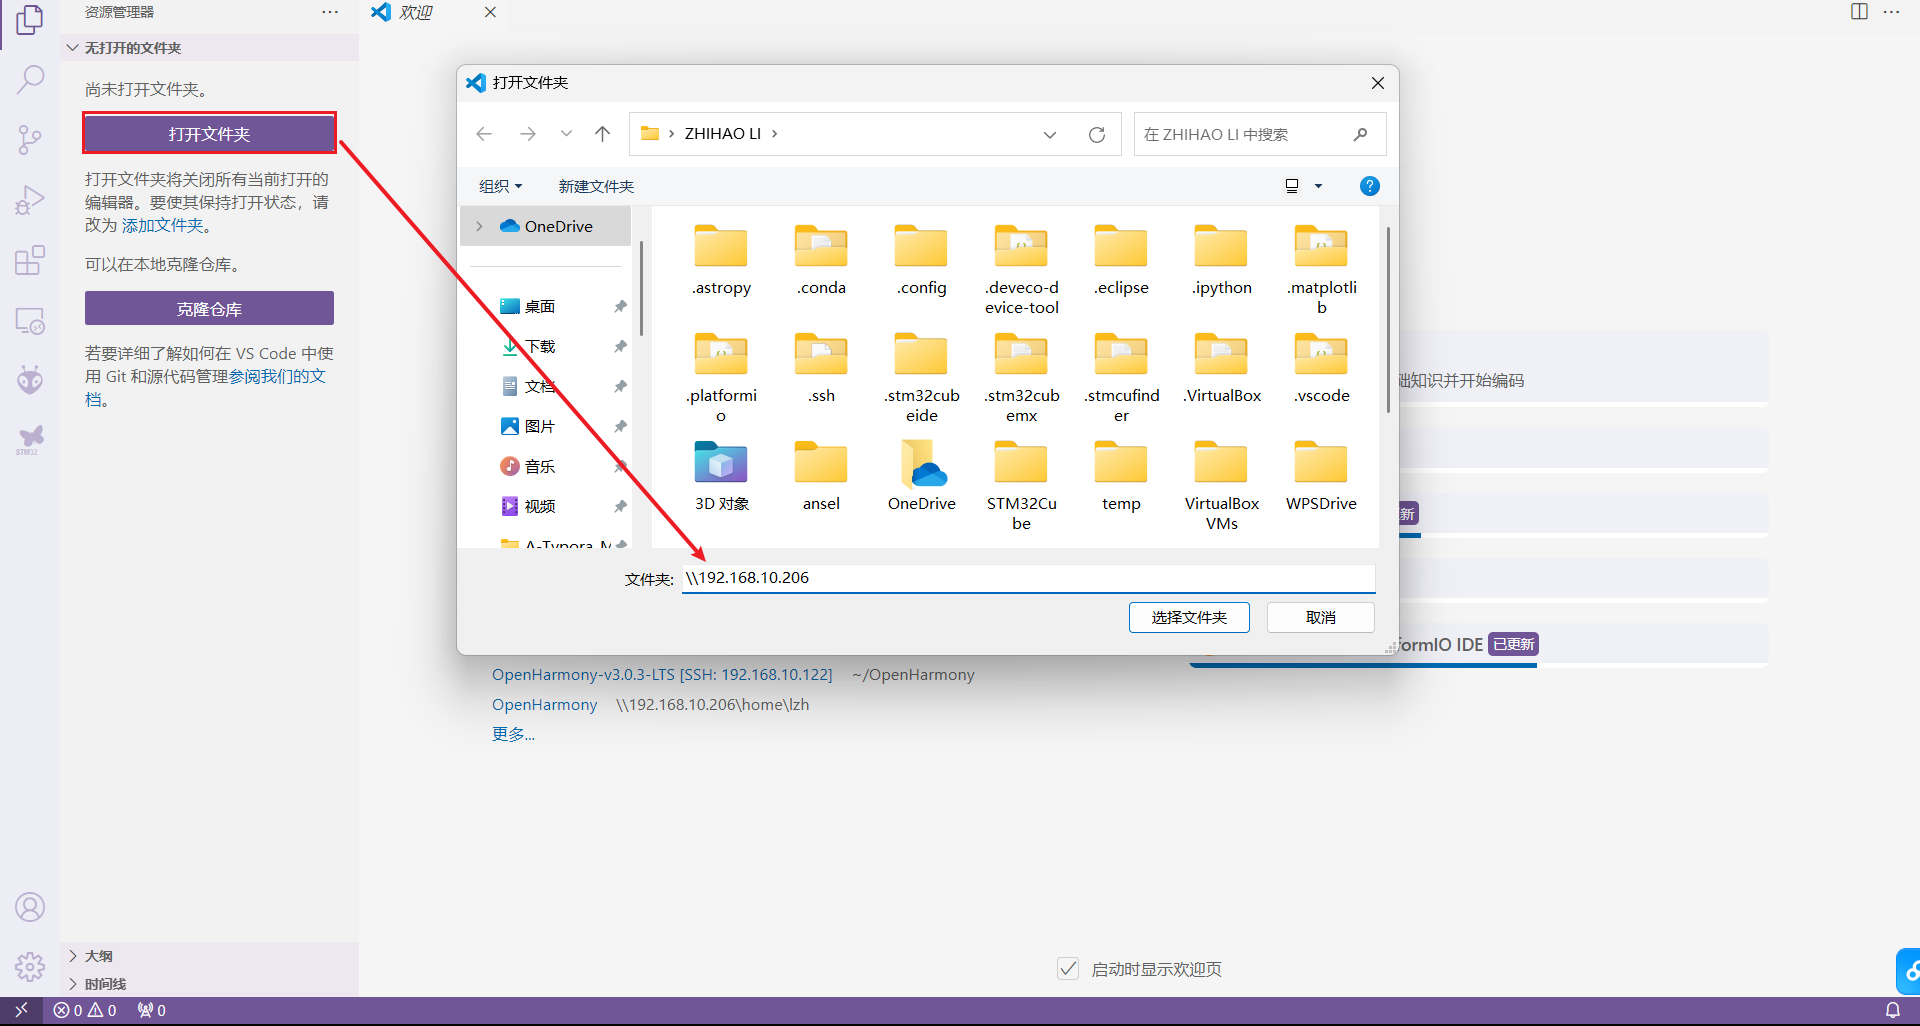
在Windows端使用Vscode打开虚拟机源码
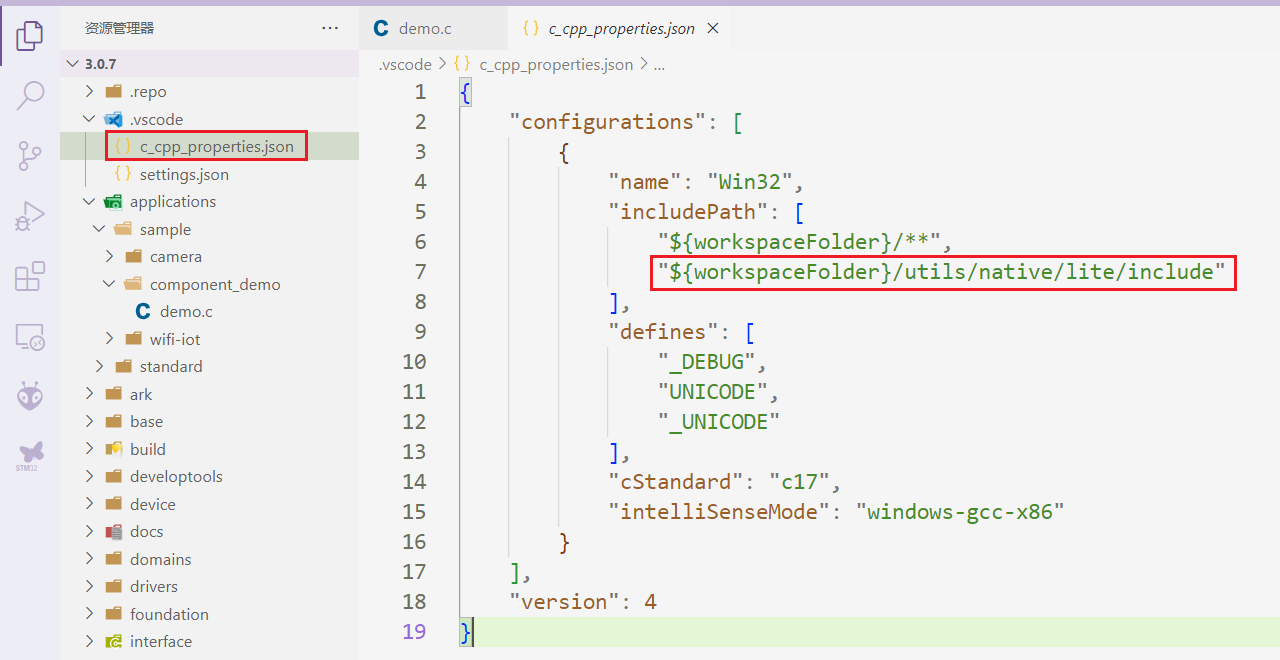
添加vscode的头文件引用,将图中标红处添加即可。
找到目录./applications/sample/wifi-iot/app,在app文件夹下一个文件夹my_first_app,代码文件hello_world.c,编译脚本BUILD.gn。具体目录结构如下:
.
└── applications
    └── sample
        └── wifi-iot
            └── app
                └── my_first_app
                  │── hello_world.c
                  └── BUILD.gn
Note
官方称呼:新增业务my_first_app,其中hello_world.c为业务代码,BUILD.gn为编译脚本。
在hello_world.c文件中添加代码
#include <stdio.h>
#include "ohos_init.h"
#include "ohos_types.h"

void HelloWorld(void)
{
    printf("[DEMO] Hello world.\n");
}
SYS_RUN(HelloWorld);
在编译脚本BUILD.gn中添加编译配置
static_library("myapp") {
    sources = [
        "hello_world.c"
    ]
    include_dirs = [
        "//utils/native/lite/include"
    ]
}
添加新组件,组件配置文件为build/lite/components/applications.json
Danger
若源码版本大于等于OpenHarmony 3.2 Beta2时,组件配置文件为build/lite/components/communication.json。
{
  "components": [
    {
      "component": "camera_sample_communication",
      "description": "Communication related samples.",
      "optional": "true",
      "dirs": [
        "applications/sample/camera/communication"
      ],
      "targets": [
        "//applications/sample/camera/communication:sample"
      ],
      "rom": "",
      "ram": "",
      "output": [],
      "adapted_kernel": [ "liteos_a" ],
      "features": [],
      "deps": {
        "components": [],
        "third_party": []
      }
    },
##start##
    {
      "component": "hello_world_app",
      "description": "hello world samples.",
      "optional": "true",
      "dirs": [
        "applications/sample/wifi-iot/app/my_first_app"
      ],
      "targets": [
        "//applications/sample/wifi-iot/app/my_first_app:myapp"
      ],
      "rom": "",
      "ram": "",
      "output": [],
      "adapted_kernel": [ "liteos_m" ],
      "features": [],
      "deps": {
        "components": [],
        "third_party": []
      }
    },
##end##
    {
      "component": "camera_sample_app",
      "description": "Camera related samples.",
      "optional": "true",
      "dirs": [
        "applications/sample/camera/launcher",
        "applications/sample/camera/cameraApp",
        "applications/sample/camera/setting",
        "applications/sample/camera/gallery",
        "applications/sample/camera/media"
      ],
修改单板配置文件vendor/hisilicon/hispark_pegasus/config.json,新增hello_world_app组件的条目
      {
        "subsystem": "applications",
        "components": [
##start##
          { "component": "hello_world_app", "features":[] },
##end##
          { "component": "wifi_iot_sample_app", "features":[] }
        ]
      },
Note
这里就跟着修改文件即可,具体关于编译脚本和组件添加问题,会在编译原理章节进一步解释。
1.6.2 编译源码
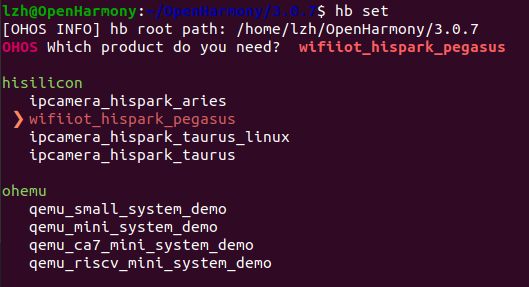
在终端进入源代码的根目录,如下图所示:

选择开发板
需要确认代码目录,我们已经在根目录,回车即可。然后,上下移动选择开发板
编译
hb build,增量编译hb build -f,全量编译

1.6.3 烧录固件
windows系统使用hiburn烧录
.bin文件
在windows系统中安装HiBurn软件,HiBurn资源下载

插上开发板,我使用的是"小熊拍-nano",查看端口

打开HiBurn软件,配置串口波特率为 2000000


选择自己端口,打开Auto burn选项

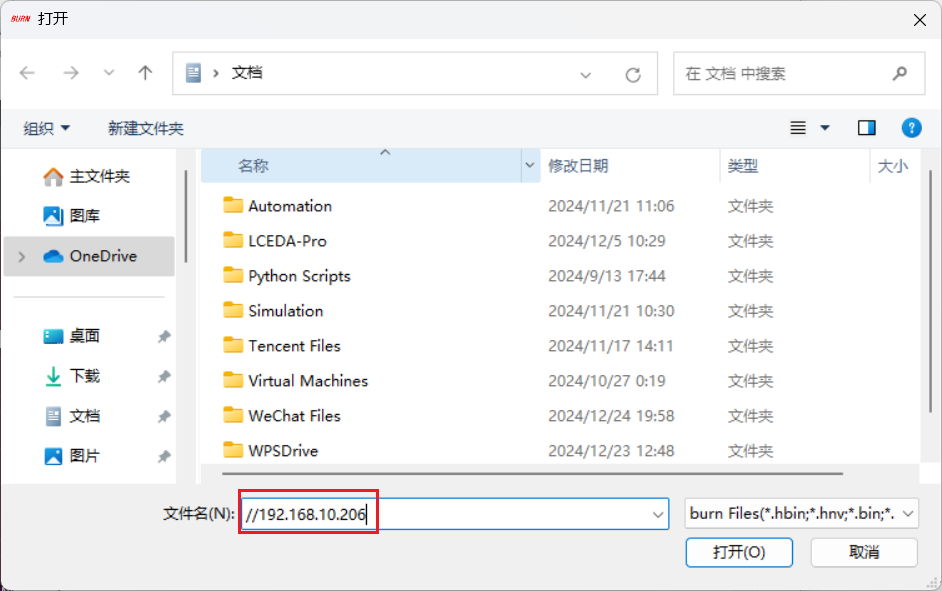
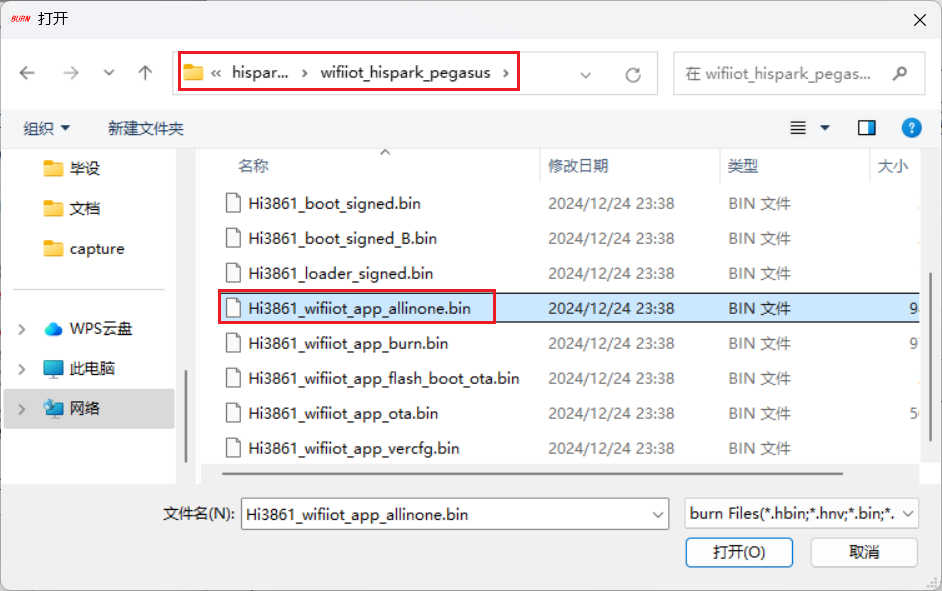
选择虚拟机的待烧录文件,在/home/username/OpenHarmony/3.0.7/out/hispark_pegasus/wifiiot_hispark_pegasus目录找到Hi3861_wifiiot_app_allinone.bin文件

\\加上你的虚拟机IP地址即可选择虚拟机的文件烧录(下图有些错误,以说明为准)
点击Connect,然后输出框出现“Connecting...”,点击开发板的复位按键烧录开始

烧录成功

1.6.4 查看输出
安装串口和ssh软件MobaXterm,MobaXterm安装介绍,然后打开一个串口界面,复位即可看到输出内容。

1.7 关闭默认测试输出
串口查看输出有很多测试信息,我们可以选择关闭,删除源码中vendor\hisilicon\hispark_pegasus\config.json的如下内容,然后hb build -f编译烧录。

1.8 AT命令联网
不要有多余的空格,否则容易错误
AT+STARTSTA             # 启动STA模式
AT+SCAN                     # 扫描周边AP
AT+SCANRESULT               # 显示扫描结果
AT+CONN="pi",,2,"123456789" # 连接指定AP,替换热点名称与密码即可
AT+STASTAT                  # 查看连接结果
AT+DHCP=wlan0,1             # 通过DHCP向AP请求wlan0的IP地址
AT+IFCFG                    # 查看开发板的IP地址
AT+PING=www.baidu.com
1.9 一些便捷使用脚本
说明:脚本非本人所写,而是在购买了《OpenHarmony轻量设备开发理论与实践》以后在配套资料中所得,希望可以帮助到阅读到此文档的开源鸿蒙学习者。为不侵占图书利益,网盘中仅存有两个便捷脚本,更多好用资源鼓励大家购买图书支持,网盘内容若有侵权请联系删除。
链接: https://pan.baidu.com/s/1o-FyN4wB-fxVT8XxQ5zhlQ?pwd=hj55
提取码: hj55
1.9.1 快速联网脚本

打开MobaXterm,右击添加脚本,并修改热点信息


1.9.2 快速烧录

文本编辑打开修改HiBurn.exe、串口号、虚拟机IP、虚拟机文件地址,双击即可完成烧录,无需来回点击HiBurn配置参数(切记先断开MobaXterm串口)

错误解析
更换介质:请把标有
 “Ubuntu 20.04.6 LTS _Focal Fossa_ - Release amd64 (20230316)”
的盘片插入驱动器“/cdrom/”再按「回车」键
注释第一行
